Looking for a way to upload any picture or image to your Facebook Gallery and not just your Androids camera photos? Then this is exactly what you are looking for. This guide will demonstrate, with pictures, the step-by-step process of uploading any image from your phone to your Facebook account.
Before we begin
This guide will be demonstrating this process using a Samsung Galaxy S4 running on Android 4.2 Jelly Bean. If you are using a different make and model of cell phone or your cell phone is running on a different version of Android then the following steps may be slightly different on your device but the general process should be the same and you shouldn’t have any issues following this guide.
Since this article covers every single step needed to upload any photo to your Facebook album, from start to finish, it is going to be split up into three different sections.
- How to download the Facebook Application.
- How to create a Facebook album on an Android smartphone.
- How to upload images to that Facebook album.
If you have already completed the first and/or second steps mentioned above and have already downloaded the Facebook application to your Android and/or already have an album created that you can move your images to then feel free to skip to the main topic of this article which is how to upload images to that Facebook album.
Downloading the Facebook Application
If you are a regular Facebook user than it’s likely that you already have this app installed on your cell phone. If you are just getting started or if you don’t yet have it installed then here is how you can do it.
We are going to want to download the Facebook Application from the Google Play Store so start out by tapping on and opening your Play Store application. This can often be found on one of your phones home pages (one of its main screens) but it can also be located by accessing your cell phones list of applications as well.

Once you have accessed the Google Play Store the easiest way to find and download the Facebook app is going to be by performing a search for it. In the upper right hand corner of the screen there should a little magnifying glass displayed. This is the Search option so go ahead and tap that magnifying glass icon.

Once the search tool is open you can perform a search a few different ways. You can type in the word Facebook (no capitalization required), you can press the microphone and say the word “Facebook”, or since Facebook is a pretty popular application it might even suggest it under the search box. Once Facebook has been typed into the search field you can press the Search key again (this time at the bottom right hand corner of the display).
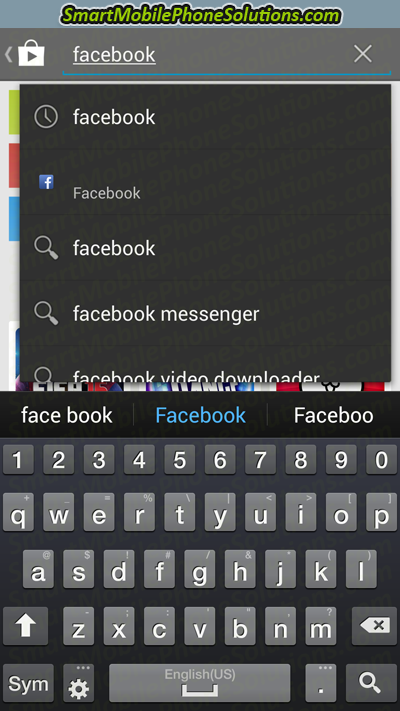
The first choice that pops up should be the official Facebook app. Go ahead and tap on that selection to open the Facebook application.

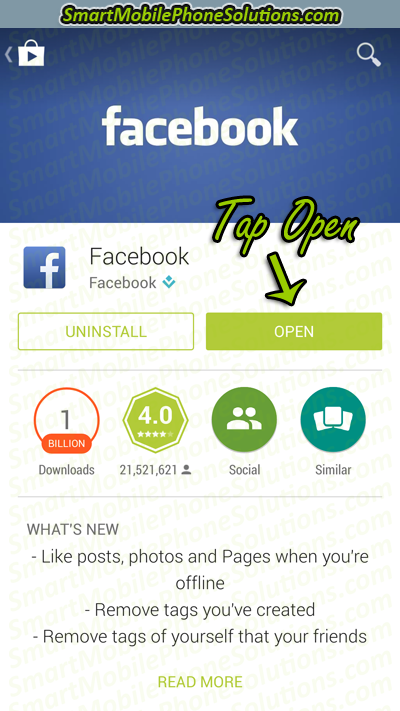
Then press the Install button.

Once Facebook has been installed go ahead and press the Open button to open it up.
You will then have to Log In to your Facebook account.

Once you have successfully logged into your account the Facebook application should provide you with a much cleaner and easier to use interface which will allow you to access and navigate the many services that Facebook’s social networking platform has to offer; and all through your Android smartphone.

The next step will be to create a Facebook Album that you can upload your cell phones pictures to.
Creating a Facebook album (through the Facebook App)
If you do not yet have an album on your Facebook account then you are going to need to create one, which you can do through your cell phone as well.
Open your Facebook application (if you didn’t already do so) and tap on the Additional options menu or in Facebook’s case the More tab. This icon is located on the far right of the screen towards the top. It looks like three horizontal lines stacked on top of each other.
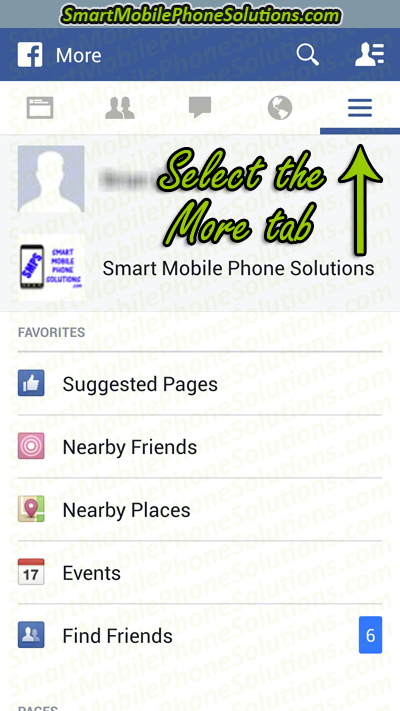
Neat Side Note: This icon is sometimes referred to as the hamburger menu. Can you see why? There is a hamburger bun on top, a meat paddy in the middle and then another hamburger bun on the bottom. Just a quick trivia side note in case anyone ever asks you what that button might be called.
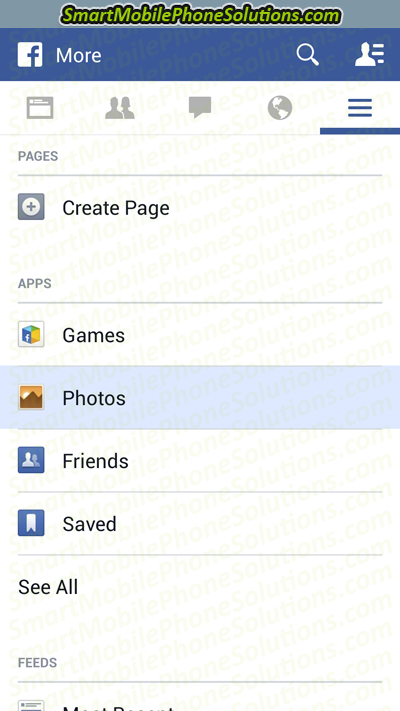
Scroll down and tap on the Photos option.
Tap on the Albums tab shown on the bottom of the window.
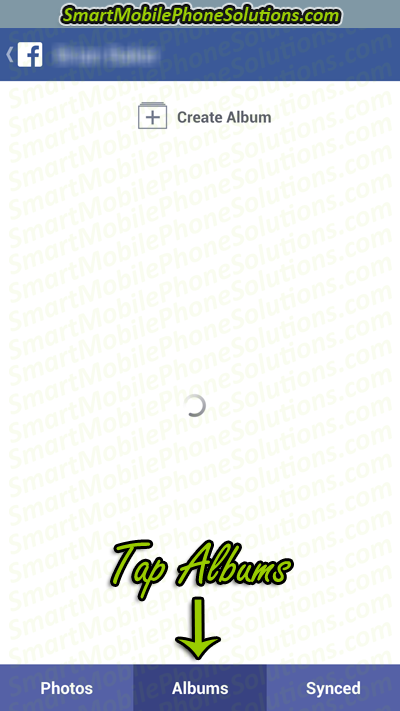
Tap Create Album.

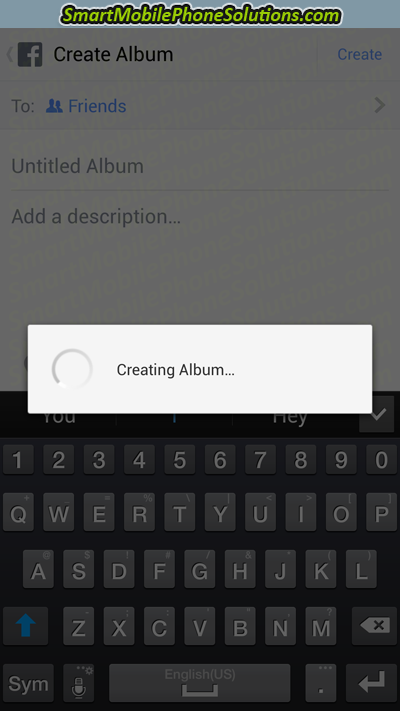
Type in a name for your Album in the first field (currently shown by default as “Untitled Album”) and then if you would like you could also “Add a description” of that album as well.
Once you have entered all of the information press the Create option on the upper right corner of the screen.

You might see a loading screen that says “Creating album” and a confirmation screen stating that the “The album was created successfully”.
At this point you will have successfully created an album and we can now upload pictures and images to it.
Uploading pictures to a Facebook album
Once you have downloaded the Facebook app from the Google Play Store and have created an album to store your pictures in you are now ready to upload your images.
Uploading pictures from your cell phones Gallery
Most pictures that are stored on an Android cell phone or its external memory card should be available through the phones Gallery. As such we are likely to find the image(s) that we would like to upload in that Gallery application.
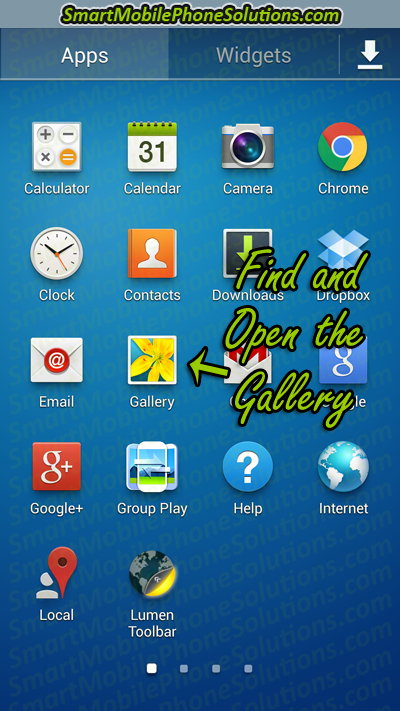
So open your phones Gallery.
You can find your phones Gallery under your phones list of applications.
Once the Gallery is open search for any Picture(s) or Image(s) that you would like to upload to Facebook.
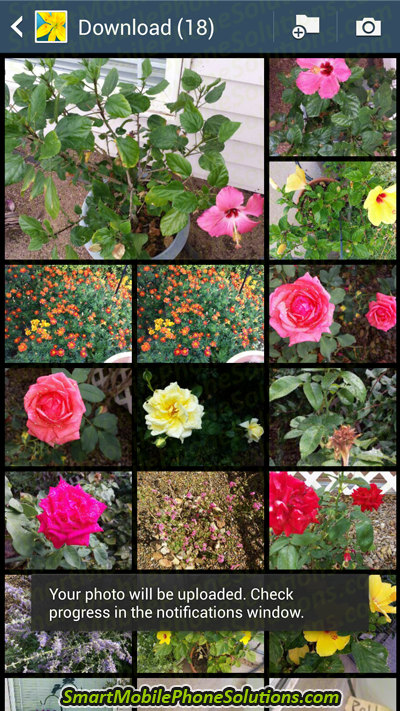
For this guide I am going to choose to upload picture(s) from the Download folder.
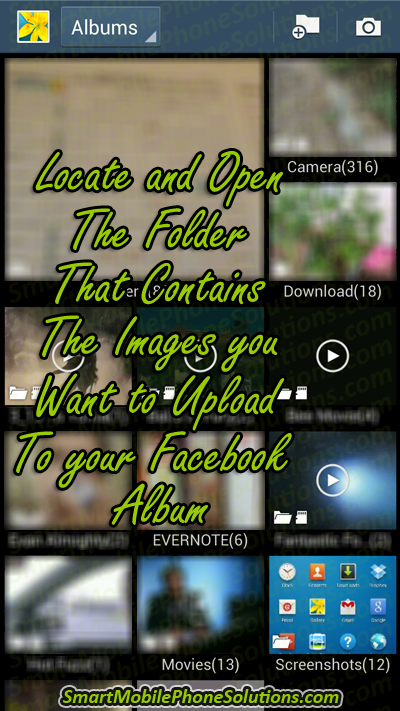
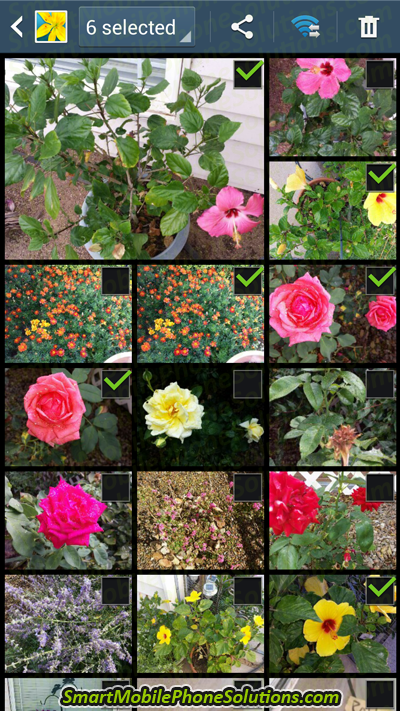
Once you have opened the desired folder you are going to want to select which pictures that you would like to upload.
Press and hold down on a desired image until it becomes selected with a checkmark. This should allow you to also select other images as well. Go ahead and select the images that you would like to upload.
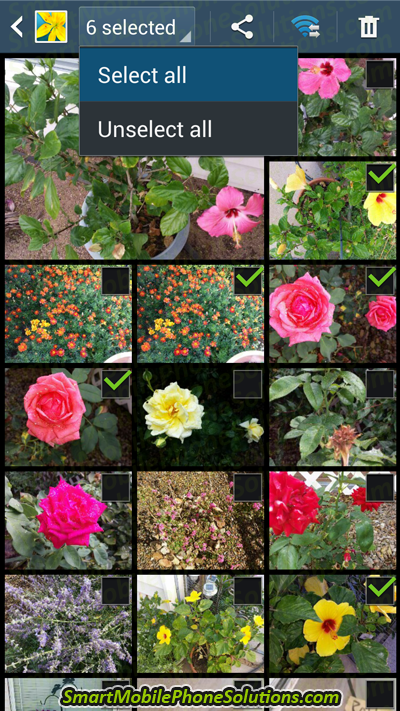
If you would like to upload every image in that folder than your cell phone should allow you to select them all at once. On the Samsung Galaxy S4 you can do so by tapping on the “selected” dropdown at the top of the Gallery and then pressing Select all.
After you have selected the images that you would like to upload to Facebook press the Share via icon on the top of the page. It looks like 3 dots connected by two lines to form a sideways tipi or sideways triangle.
![]()
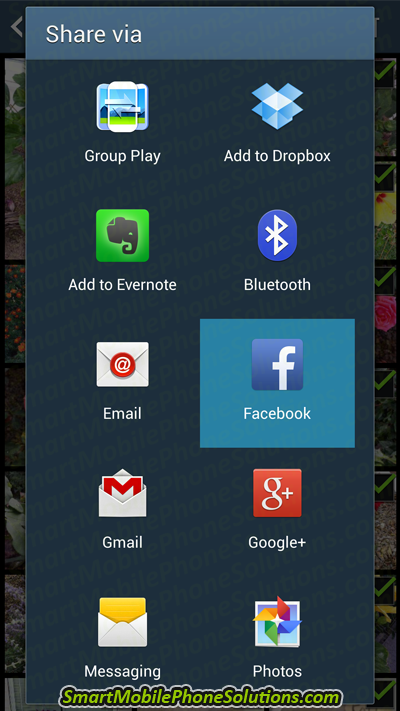
You will then have many different options to choose from concerning how you want to share these images. Since you have the Facebook App installed you should see a Facebook option to choose from. Once you locate that option go ahead and tap on it.
Now the Facebook application is going to believe that you want to add that image to a Post by default but that’s not what we want to do at the moment. We want to upload it to an album, so at the bottom of the screen you are going to see some icons and options to choose from.
Next to the Camera icon (which is likely the option selected) there is another icon that looks like three squares stacked on top of one another. This icon allows you to access your Facebook album list. So tap that icon and open up your list of Album folders.
![]()
You should be able to see the list of albums associated with your Facebook account. Go ahead and choose the album that you would like to upload your images to.

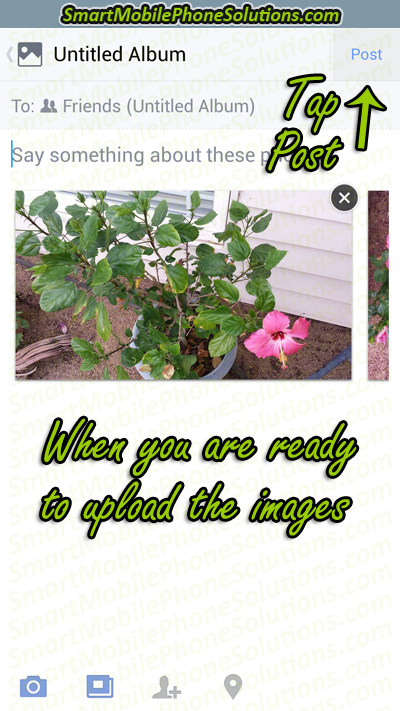
If you like you can “Say something about these photos”.
When you are ready to upload the images tap on the Post option located in the upper right hand corner of the display.
You might get a confirmation message stating that “Your photo will be uploaded. Check progress in the notifications window”.
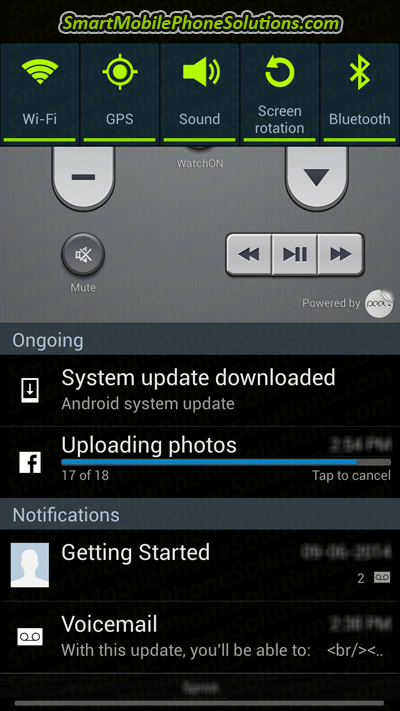
If you would like to check on the progress of the upload then you can do so by accessing your phones notification window. To access this feature merely drag your finger from the top of the display to the bottom of the display. It’s as simple as dragging that bar that contains the signal strength, battery life, time, etc. to the bottom of the display screen.
Once you have accessed this screen you can check on its progress and confirm when your pictures or images have successfully uploaded to your Facebook Album.
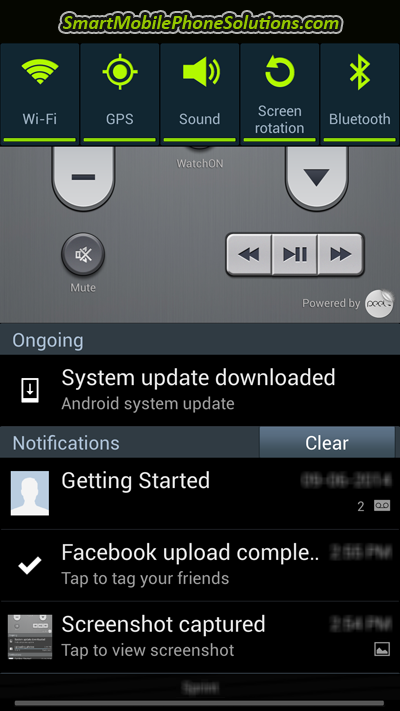
Once the pictures are done uploading they should then be available through your Facebook account and you will have successfully copied images from your phone to Facebook.
That’s how you can upload images to an album on Facebook
I was really surprised when I could not find an option to upload images to an album through the Facebook app interface. I have a feeling that this feature will likely be added some time in the future, or at least be a little more user friendly, but for now I hope that you have found the instructions in this guide beneficial and helpful when trying to move images from your phone to your Facebook account.
If you did and you would like to show me that you enjoyed this guide then please let me know you liked it by pressing the Facebook Like button and Google + buttons and feel free to leave a friendly remark in the comment section below.
Thanks for reading and I hope you have a fantastic day.


1 thought on “How to move pictures to a Facebook Album Android”
Facebook Photo Album
Outstanding step by step Easy How to Do Guide
I’ve been searching for an App in the Play Store
Not Needed
Thanks so much for these step by step instructions!
Joanne