Are you searching for a way to setup your Sony Xperia Miro so that your camera photos get stored directly to its memory card? Then you are in the right place. This guide will show you step by step how to set the default storage location for the camera on a Sony Xperia Miro running on Android 4.2 Jelly Bean.
Saving camera photos directly to the memory card
This feature lies in the camera options themselves so start out by opening the camera application on your Sony Xperia Miro.
The camera application can be selected by accessing your cell phones list of applications and then tapping the camera app on that list.
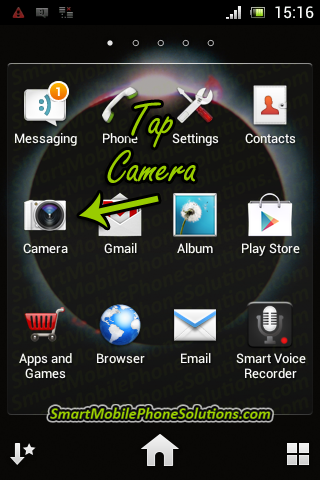
Once the camera application is open you will see some options on the screen.
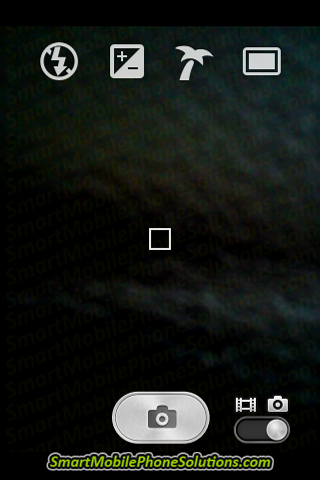
We are going to want to access some additional settings by pressing the Menu key. The Menu key is located on the bottom of your Sony Xperia Miro under its display screen. It’s to the right of the Home key and looks like four horizontal lines with the top line slightly longer than the three underneath it.
So press that Menu button and you should see some additional options to choose from.

Once presented with that list of settings you are going to want to find Data storage. You may have to scroll to the second page of that list of options. You can do this by swiping your finger across the screen from right to left (like turning a page in a book).
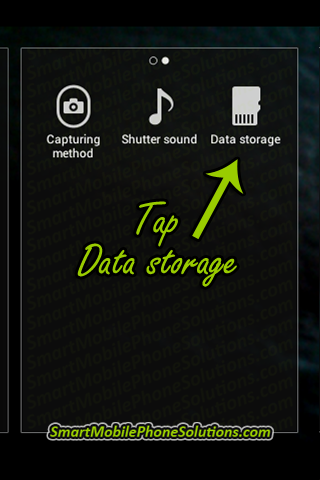
Once you have located the Data storage option go ahead and tap it to open it.
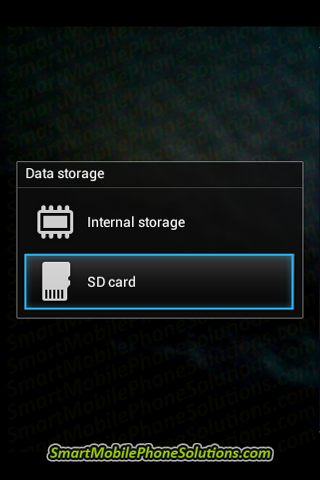
You will then see two options; an Internal storage option and an SD card option.
If you want your camera photos to be sent to and saved directly to your memory card (external memory card that is) then you are going to want to make sure that the SD card option is selected.
The Internal storage is the phone storage and if this option is selected then your camera photos are going to be saved to your phone.
I recommend that you invest in a good memory card and then set your default storage for your Sony Xperia Miro’s camera to that SD card. Then if your phone ever malfunctions or becomes damaged you will be able to remove that memory card from the malfunctioning unit, insert it into a different phone (or even a computer) and restore all of your information.
Quick Recap: How to setup your Sony Xperia Miro Camera storage
Open the Camera app > tap the Menu key > open Data storage > tap SD card
Now you know how to setup your cell phones camera storage
Don’t forget to move your original photos to the SD card
Don’t forget to move any pre-existing pictures or media files that were taken with your phones camera before inserting an SD card and setting the default storage to that memory card. These pre-existing pictures will need to be moved manually from your Sony Xperia’s internal storage to your SD card. They will not transfer automatically. If you would like a step-by-step guide (with pictures) of how to do this then I recommend reading How to move pictures and videos to an SD card on a Sony Xperia smartphone.
Thank you for reading
I hope that you found this guide informative and helpful when setting up a Sony Xperia Miro (or similar Sony Xperia) cameras default storage location.
If you did and you would like to show me you liked it then don’t hesitate to post a friendly remark in the comment section or by simply pressing the Facebook Like and Google + buttons below.
I would like to also thank a previous visitor to our website (who preferred to remain anonymous) for taking the time to contribute the screenshots displayed in this article. Thank you for helping to make this site even better!
Enjoy your Sony Xperia smartphone and don’t hesitate to check out some of the other interesting and instructive posts on this site. Have a fantastic day.